When a dynamic sensor is created, the name is also generated. The name can take a number of different forms which are set on the Dynamic Sensor Options tab.
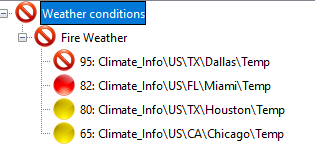
The default is to simply use the name of the first fact (see Dynamic Sensor Basics). This was used in the example below and you can see each it represents the city temperature. Since it can be long and based on underlying data structures, it may not be user friendly. Dynamic Sensor Using Multiple Metrics used multiple metrics so the first one might not tell the whole story.
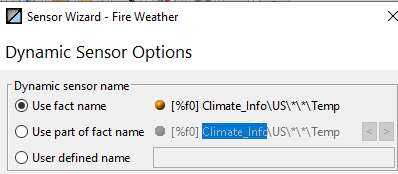
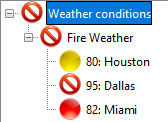
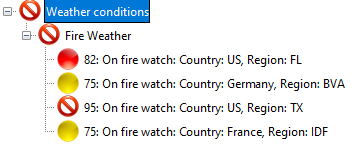
The next option is to use part of the fact name. The hierarchy is shown and you can use the arrows on the right to move the highlight through the hierarchy. For example, the City name is the next to last field so selecting this shows the city only. This is much clearer than the previous but could be confusing if there are multiple city of the same name in different states.
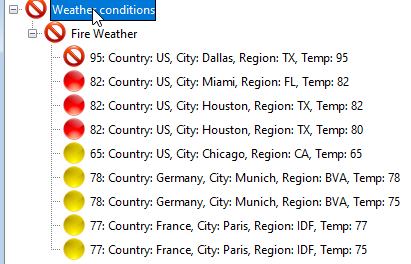
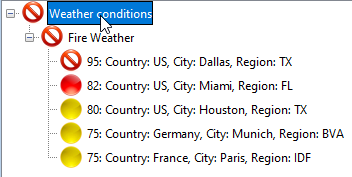
The final option allows you to construct the name, using literals, parts of the facts and other components. For example, we can include the country, region and city using these options which use their relative hierarchy positions and literals.
User defined name: Country: %1, City: %3, Region: %2
This produces a more helpful description of the sensor.
Important naming considerations
- There can only be one dynamic sensor of a given name at any given time. Only the first one will be created, the others will fail, For example, if using the second option, only 1 city called Houston would show up.
- You can use restriction in some cases to reduce the number of alerts. As a hypothetically example, if you only wanted to alert for a given region on time if there was fire possibility, you could name the sensor using only the region.
- The name of the sensor cannot vary once created. That is, the name of the sensor cannot include the temperature since it changes. If you do this, you will see multiple orphaned sensors.